

Getting Started on Static Web Hosting
There are many options to host a static website nowadays, one way is to do so on AWS S3. This guide will walk through the steps required to setup static assets hosting on S3, configure CDN on CloudFront, request SSL certificate through Certificate Manager, and finally routing to custom domain names using Route 53.
There’s quite an extensive list of resources on AWS official documentation and also other blogs that talk about the step-by-step configuration of each service used for the hosting. The purpose of this article is to fill in the gaps that were not explicitly mentioned in those resources, specifically for the context of using a custom domain that is registered on Namecheap.com, but everything else lives on AWS.

Bookmark these services in AWS Console.
SSL Certificate by Certificate Manager
You want to allow HTTPS access to your site, and you will need a SSL certificate. You can request for a free certificate via Certificate Manager. Take note that you must choose the N. Virginia (us-east-1) region to request for the cert, otherwise, you will not be able to use it later when setting up CloudFront.
Another thing to note is that, your apex domain (eg. tripletee.app) must be added as an individual record, and if
you plan to have multiple subdomains for your site, then it is better to add those specific subdomains when creating
the certificate.
For example, tripletee.app, www.tripletee.app and demo.tripletee.app are all domains that will be needed to serve
the Triple Tee App home page and demo site. For convenience, I also added a wildcard domain *.tripletee.app in case
I have to add more subdomains.
Also note that if you have more than 1 level of domain nesting, you must specify each explicitly. For example, I might
need mac.downloads.tripletee.app and windows.downloads.tripletee.app to serve 2 different desktop user groups,
and each subdomain has to be added explicitly to the certificate.
Once you have created the certificate, you will need to add them to Route 53. There’s an action to create records in Route 53, and if you click that button, you will see the list of domains you’ve just added, and their respective CNAME values. Normally you would add these to your domain registrar like Namecheap.com, but here we will use Route 53 instead so that we can leverage the free SSL certificate provided by AWS.
Before these records can be added to Route 53, remember to first create a hosted zone with your apex domain name,
eg. tripletee.app.
For this step, it is best if you have already thought out clearly what are the subdomains you need for your site, because once the certificate is created, you will no longer be able to add subdomains to it, and have to create a new certificate, re-configure everything and remove the old certificate.
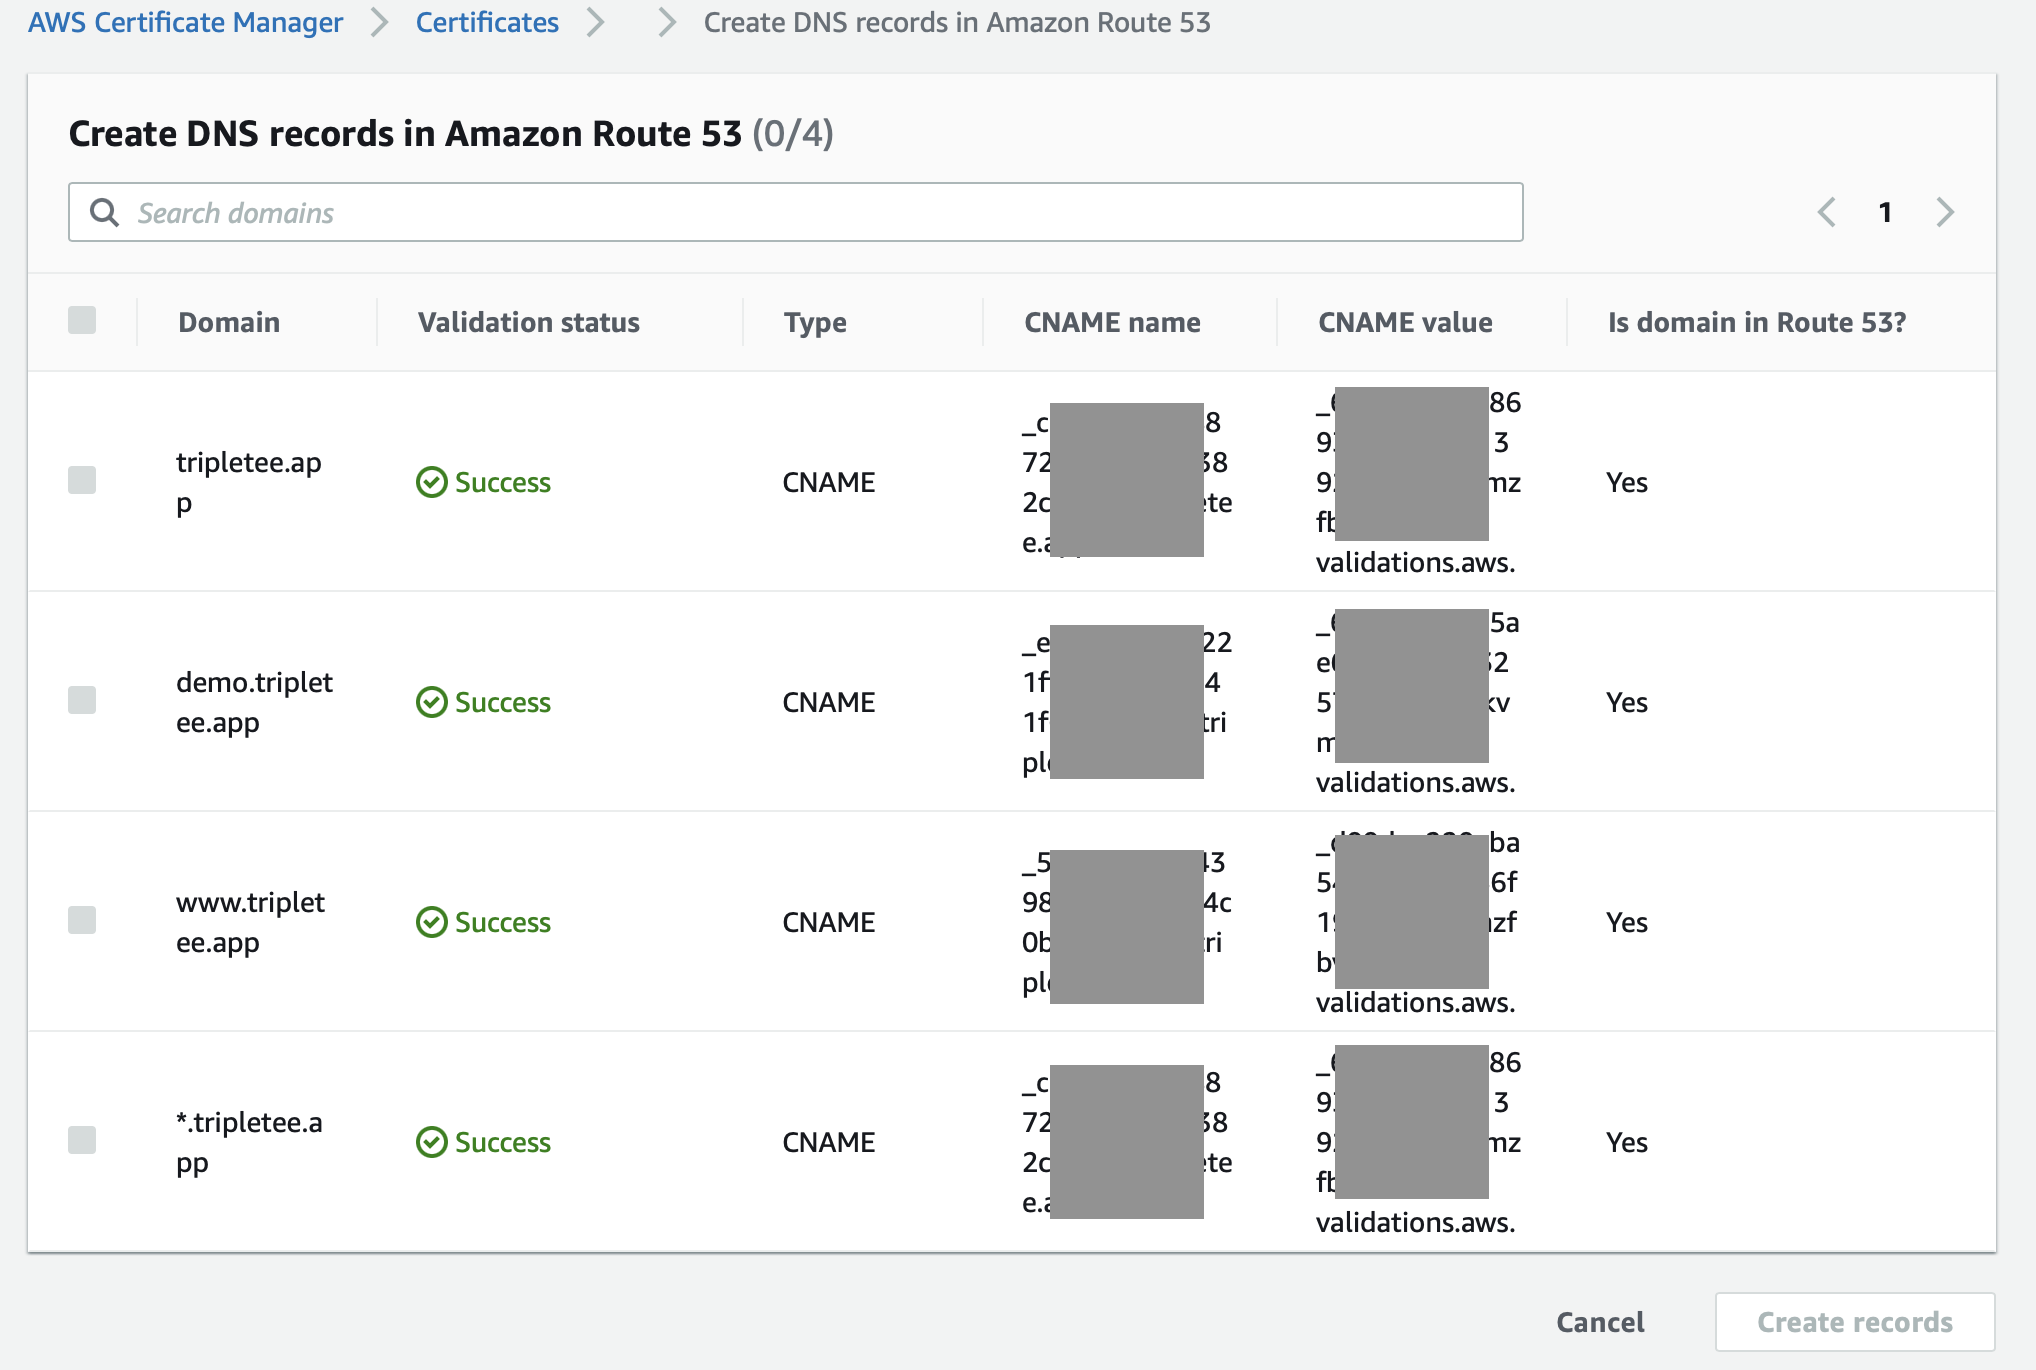
Explicit domain names for the certificate.

CNAMEs added to Route 53.
Assets Hosting on S3
You need to store your site assets somewhere to be served to the users on the Internet, and this is done on S3 buckets.
To host your website, create a new bucket that is named after your intended domain, eg. tripletee.app is the bucket
that contains the assets to serve at https://tripletee.app later.
There is no restriction to the region used for the bucket, but what’s important is that you have to uncheck “Block Public Access” option for the bucket, so that the public can access the content.
Another important point is to setup the bucket policy to allow public “GET” access on the bucket.
{
    "Version": "2012-10-17",
    "Statement": [
        {
            "Sid": "PublicReadGetObject",
            "Effect": "Allow",
            "Principal": "*",
            "Action": "s3:GetObject",
            "Resource": "arn:aws:s3:::<your_bucket_name>/*"
        }
    ]
}
Create as many buckets as needed for each subdomain that has its own assets to serve. For example, the Triple Tee App
have different assets for the home page and the demo site, so there are 2 buckets created: tripletee.app and
demo.tripletee.app.
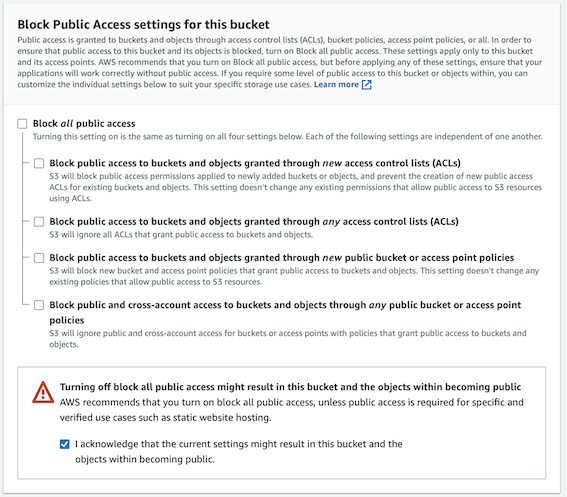
You must uncheck “Block Public Access” option for the bucket.
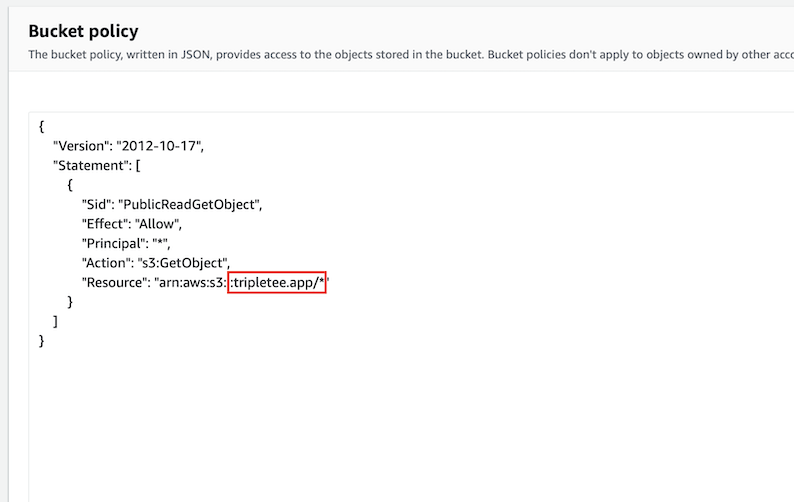
Bucket policy to allow public “GET” access.
Content Delivery via CloudFront
To allow quicker access to your site, you can setup a CDN for global distribution. By now, you should have already created a S3 bucket to host the site assets, and the SSL certificate for HTTPS requests. When creating a new CloudFront distribution, you will be asked to choose from the S3 buckets and SSL certificates you’ve created. This step should be quite straightforward if you have done the previous steps correctly.
If you have multiple S3 buckets to serve, then you will need to create 1 distribution for each bucket, still using the same SSL certificate if you have setup multiple subdomains for the certificate.
Hopefully you have taken notice in the previous step to request the SSL certificate at the N. Virginia region, or else you will not be able to continue with this step.
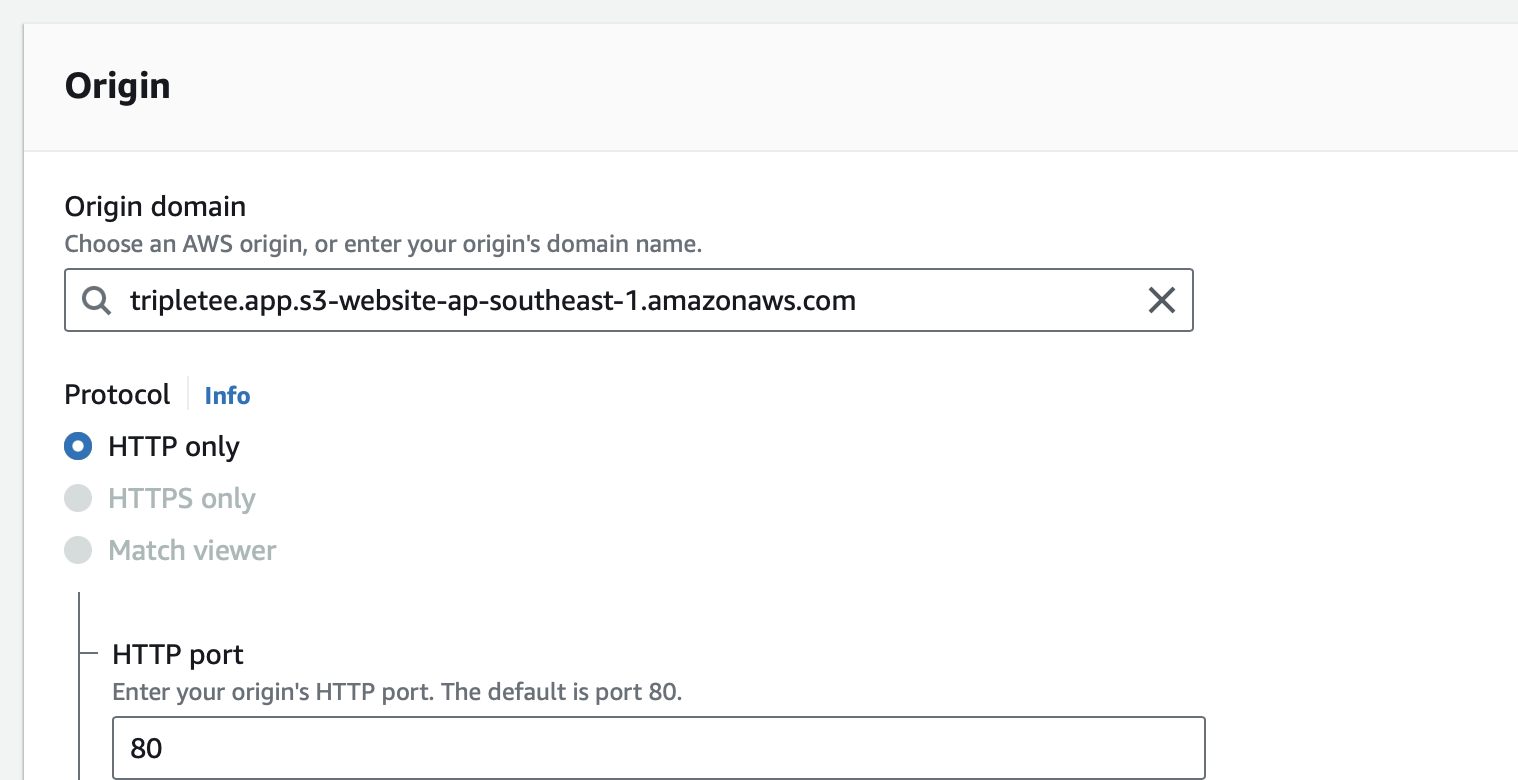
Use the bucket’s web endpoint as origin.
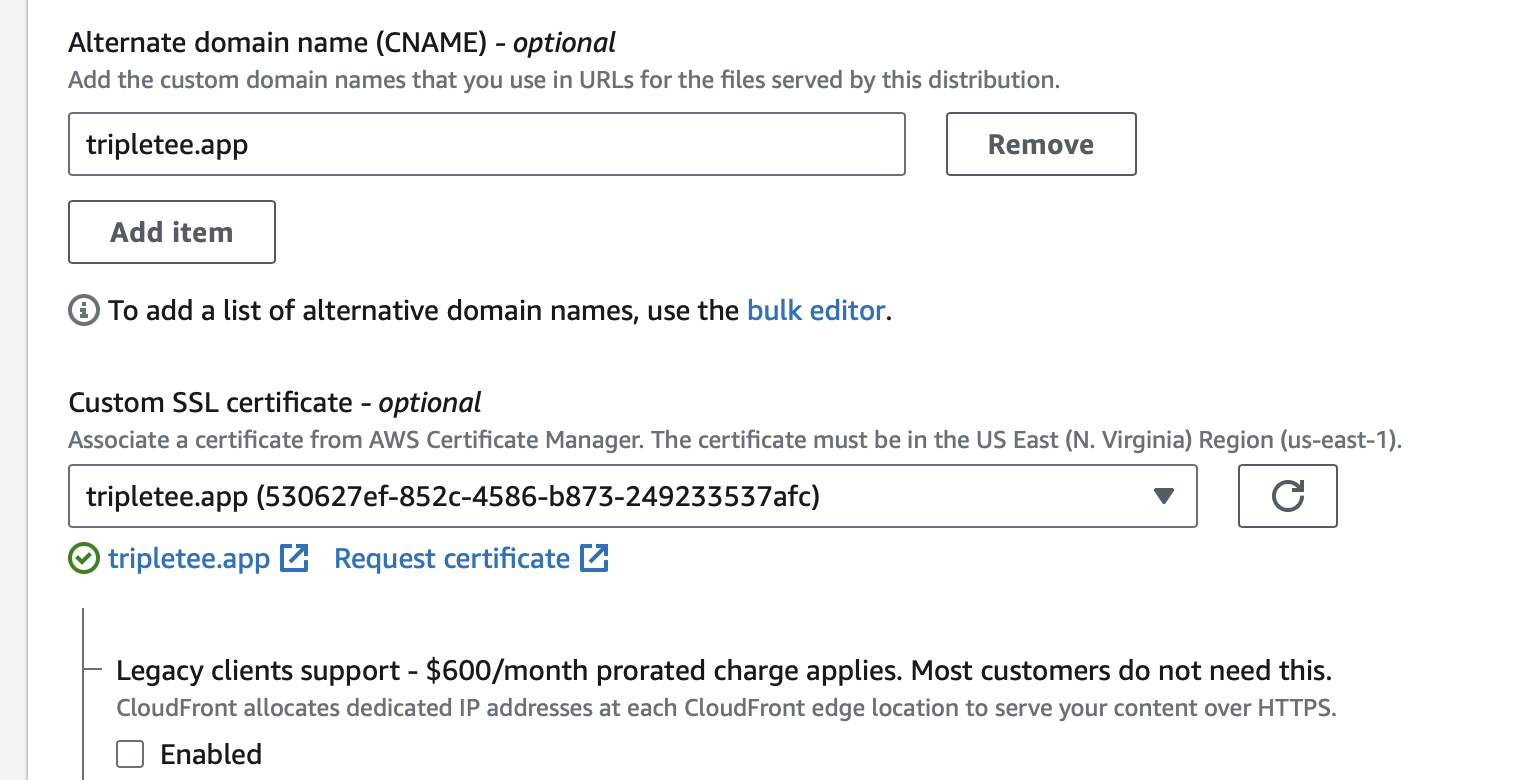
Configure alternative CNAME and SSL certificate.
Adding Alias Records to Route 53
Once you have setup your CDN, you can add Alias (A) records to Route 53 to route incoming requests for your domain to fetch from the CloudFront distribution.
You will at least want to setup the apex domain and the www. variant so that your users can visit both
https://tripletee.app and https://www.tripletee.app. You can reuse the CloudFront distribution for these domains as
they are both supposed to serve the same assets.
If you have created other buckets to serve different assets at a different subdomain, then you will need to add a new A record for each CloudFront distribution.
Again, hopefully by now you have created the CDN distribution in the N. Virginia region, otherwise you will not be able to proceed with this step.
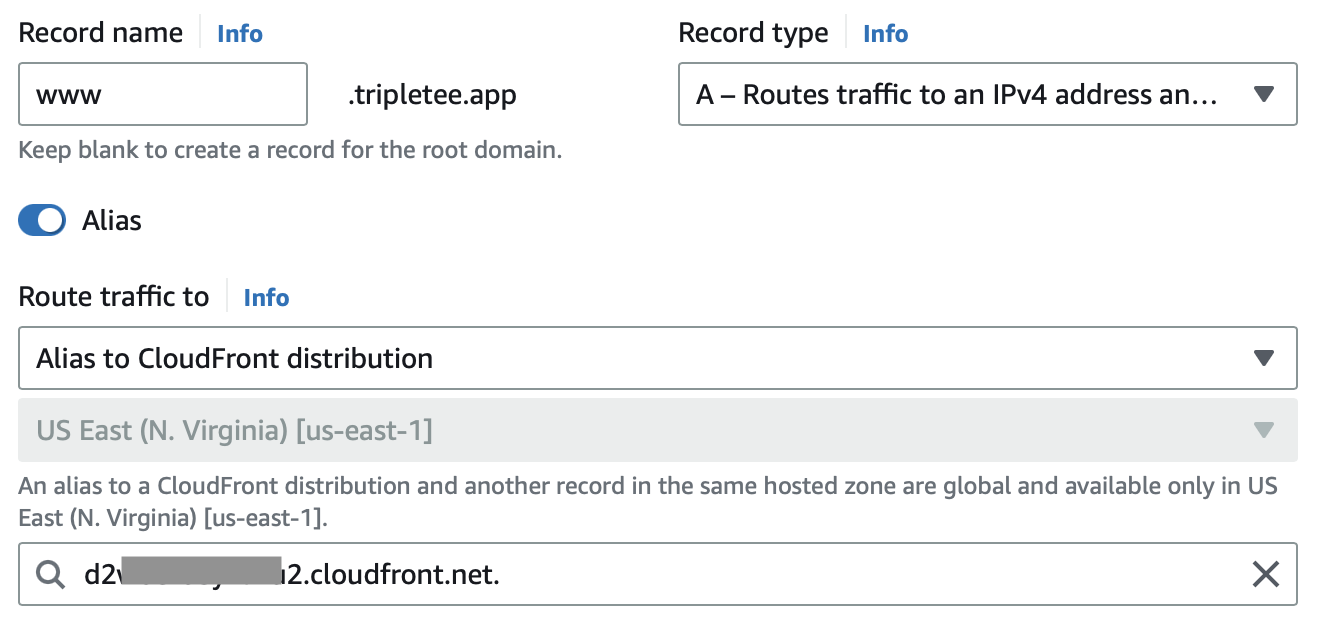
A record for each subdomain.
Custom Domain Nameservers on Namecheap
At the final step, you will need to tell Namecheap.com that you are using a custom nameserver for the DNS lookup instead of using Namecheap’s. Once you have setup all the domains in Route 53, you can now add the custom nameservers from AWS in Namecheap.
There should be a Nameserver (NS) record type with a list of 4 nameservers for your apex domain. Add these exactly to the custom nameservers in Namecheap. Notice that once you do that, you will no longer be able to add any DNS record to your domain within Namecheap.

List of nameservers for your domain in Route 53.
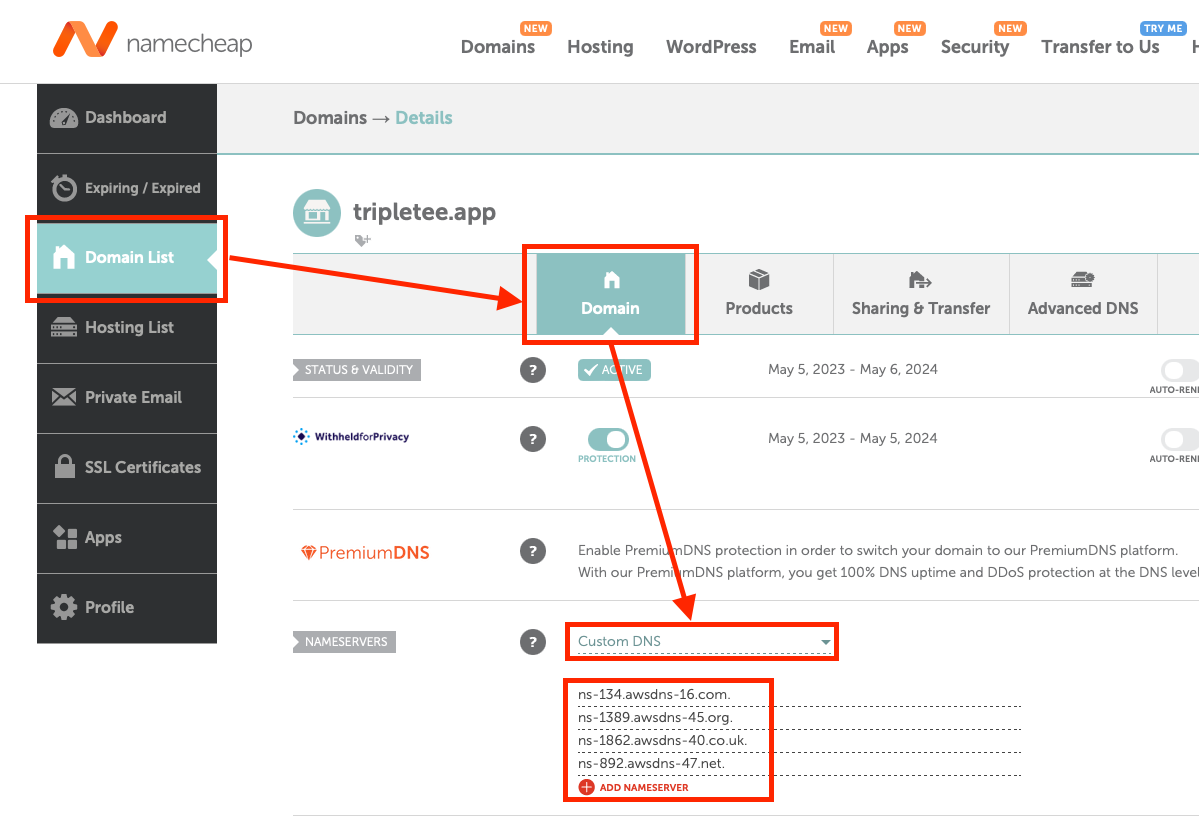
Configure custom nameservers in Namecheap.
DNS Propagation
It takes some time for the DNS changes to propagate across the Internet, so you might not see your site served at your domain right away. But if things go right, eventually you should be able to access your site and see that you have a secure connection with a valid certificate.
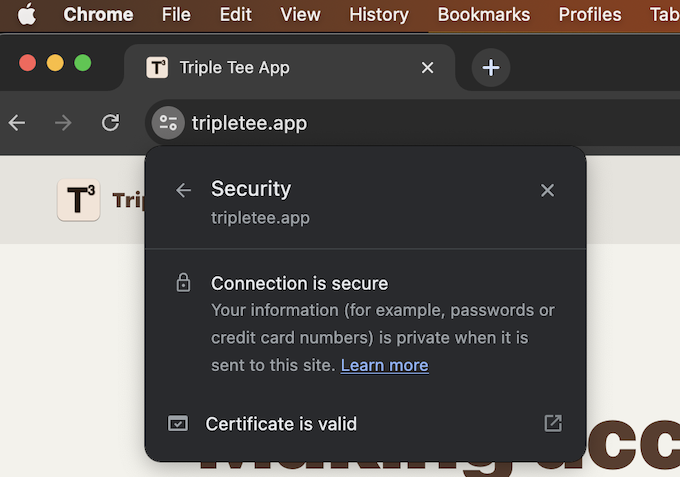
Good sign that you have done everything right.
That’s All
The entire process of configuration should not take more than 30 minutes if you have a simple static site without any subdomain. Hopefully this guide has highlighted some pitfalls and filled in the gaps that are absent from other existing guides.