

It’s Been A While
It’s been almost 3 weeks since the last post in this series, quite a lot has happened and I’m excited to share some of the learnings during this period of development.
Let’s do this!
Electron App Configuration
Since the early stage of the design, I’ve wanted this app to be desktop-based. But for ease of development, I’ve chosen to use Electron to package the Express.js app to run on desktops. Given that this is a desktop app, I thought that giving the user some configuration options will be a good UX.
The first roadblock I faced when building the configuration screen is, how do I allow the user to choose where to load the data files from? I read the the Electron documentation, and found a few features that allow me to achieve that.
Inter-Process Communication
First of all, the configuration screen is just another web page, which I’ve built with plain HTML and Javascript without using Vue. When the Electron app is launched, the server app is not yet started, because I want to allow the user to choose a port to start the server through the configuration screen. Once the user has input the port and data directory, I will write these options to file, and the Electron main process will start the server app.
The interaction between the configuration screen and Electron main process is done through IPC.
This is how the interaction between User, Electron main process (main.js), configuration screen (renderer.js), server (server.js) and client (client.js) apps looks like:
%%{
  init: {
    'theme': 'base',
    'themeVariables': {
  "primaryColor": "#f4e3d7",
  "primaryTextColor": "#502d16",
  "primaryBorderColor": "#784421",
  "lineColor": "#784421",
  "secondaryColor": "#a05a2c",
  "tertiaryColor": "#c87137"
}
  }
}%%

sequenceDiagram
    participant User
    participant main.js
    participant renderer.js
    participant server.js
    participant client.js

    User->>+main.js: Launch Triple Tee App
    main.js->>+renderer.js: Populate configs from file
    renderer.js-->>User: Render config screen
    Note right of renderer.js: Wait for user input
    User->>renderer.js: Input config options
    renderer.js-->>-main.js: Callback with user input
    main.js->>+main.js: Write configs to file
    main.js->>+server.js: Launch Server at chosen port
    server.js-->>-main.js: Listen at chosen port
    main.js->>+client.js: Load Client to BrowserWindow
    client.js-->>-main.js: Return Vue App
    main.js-->>-User: Render Triple Tee App
The IPC is implemented using the contextBridge and ipcRenderer modules.
Since the configuration screen has no access to native Node.js APIs, eg. accessing the file system, we need to use the
preload script to load and expose the default configs from file. Then, we expose the API for the configuration screen
to call back when we receive user’s input, which internally sends the set-app-config message.
// preload.js
const { port, dataDir } = readConfigFromFile(configFile);
contextBridge.exposeInMainWorld('initAppConfigs', { port, dataDir });

contextBridge.exposeInMainWorld('electronAPI', {
  setAppConfig: ({ port, dataDir }) => {
    ipcRenderer.send('set-app-config', { port, dataDir });
  },
});
In the configuration screen, we will setup the usual form inputs, and the user will click a button the confirm the configuration. On button click, we then call the API setup earlier in the preload script to send the input values to the main process.
// renderer.js
launchButton.addEventListener('click', () => {
  const port = portInput.value;
  const dataDir = dataDirInput.value;
  window.electronAPI.setAppConfig({ port, dataDir });
});
In the Electron main process, we will listen for the set-app-config message, and on receiving it, write the configs
to file, load the server app and request for the client app at the chosen port.
// main.js
ipcMain.on('set-app-config', (event, { port, dataDir }) => {
  writeToFile(configFile, { port, dataDir });

  require('server.js');

  win.loadURL(`http://localhost:${port}`);
});
Finally, we allow the server app to read the port from the config file when it is loaded by the Electron main process.
// server.js
const app = express();
const { port } = readConfigFromFile(configFile);
// this will load the client app index.html at root path
app.use(express.static(path.join(__dirname, 'public')));
app.listen(port);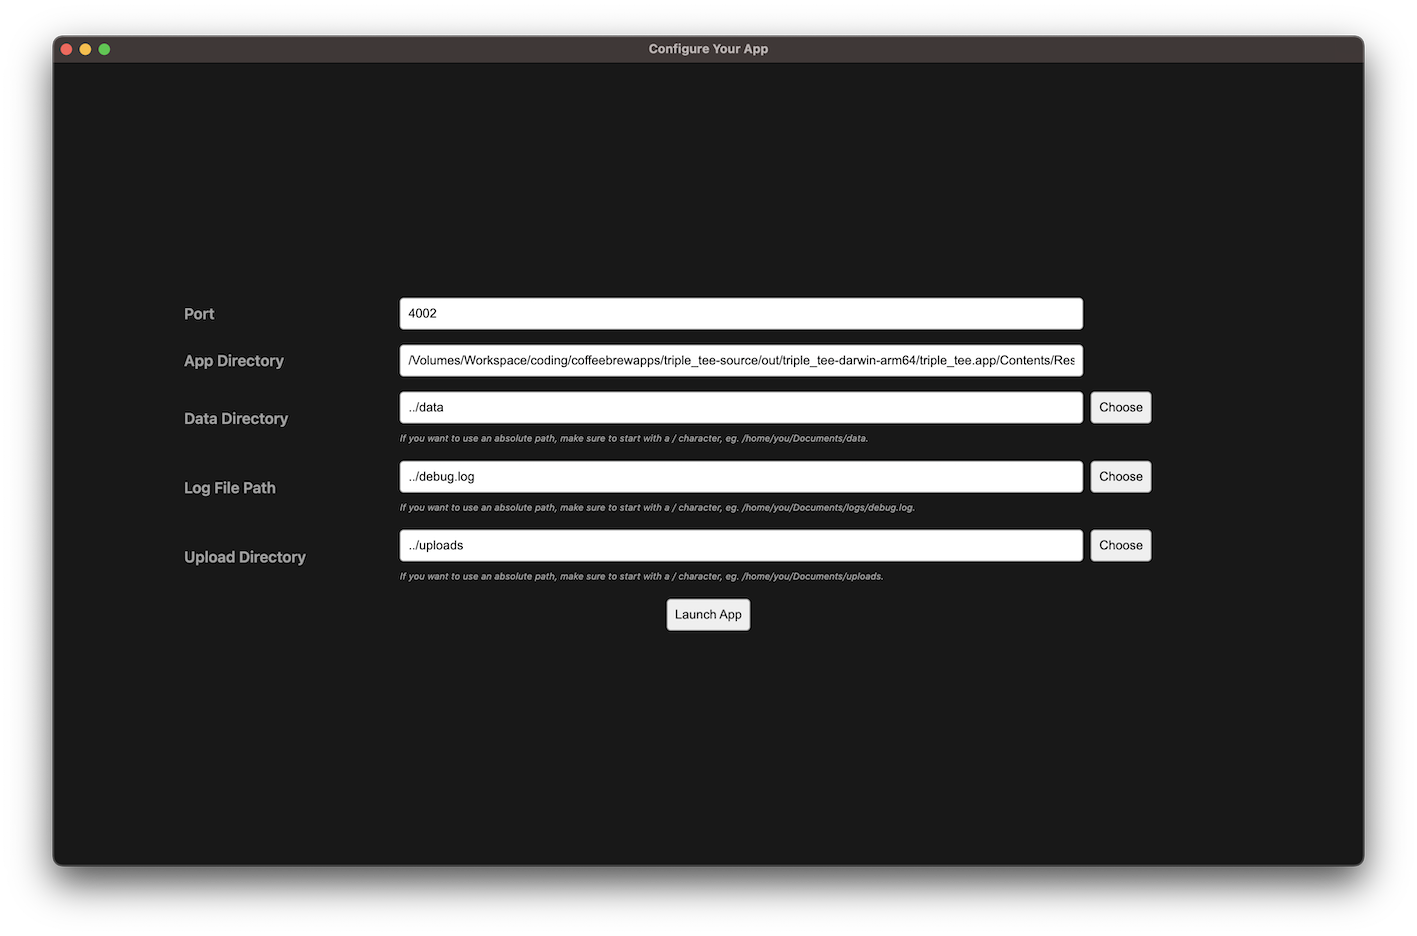
IPC allows for user interaction with the app before the server is launched.
Web Demo Build
Although this app is primarily a desktop app, I also want to provide a web demo on the app’s landing page (yes, I will build a dedicated landing page for the app soon), which allows the prospective user to try out the app without downloading it. This is quite conveniently done, because the client app is already written as a Vue app and can be easily deployed as a SPA on my target, eg. Github Pages. The only question is whether I want to host the server on the cloud also to serve the business logic and data for the demo app.
In the end, I’ve decided to not host the server app, for a few reasons. First, I want to save on hosting cost, since I intend to offer the app for free, it’ll be economically unsound if I had to spend more money on it on top of my own time and effort to build the app. Second, I don’t want the user to end up using the web demo like an actual app, and start sending sensitive personal data to my hosted server, which can be viewed by other users of the demo since there’s no user access control built in yet.
Abstract Data Access Layer
To solve the issue, I decided to make the client app’s data access layer abstracted, and can choose between accessing logic and data via APIs or through client-side stores at build time.
First, the abstracted data access layer can choose between using API access or client-side data access during build
time. I assign the web demo as staging environment, so when I build for staging, it will use client-side data
access.
// client/dataAccess.js

import { useDataStore } from 'client/store';

export function useDataAccess() {
  const dataStore = useDataStore();
  if (env.MODE === 'staging') {
    return useWebAccess(dataStore);
  } else {
    return useApiAccess();
  }
}
Then, my client-side data access will implement the CRUD APIs as per the server-side data access layer.
// client/web.js

export function useWebAccess(dataStore) {
  return {
    list: dataStore.list,
    create: dataStore.create,
    // omitted for simplicity
  };
}
But instead of reading from data files, the client-side data store will read from the browser’s localStorage. It will
also implement data cache as per server-side implementation, so that the behaviour is more consistent between the
actual Electron app and the web demo.
// client/store.js

export const useDataStore = defineStore('data', () => {
  const dataCache = ref({});

  async function list(modelClass, params) {
    return dataCache.value[modelClass];
  }

  async function create(modelClass, id, params) {
    dataCache.value[modelClass][id] = params;
    localStorage.setItem('data', dataCache.value);
  }

  // omitted for simplicity

  return {
    list,
    create,
    // omitted for simplicity
  };
});
Custom Business Logic
There’re some custom logic APIs beyond the usual CRUD actions, and I need to implement them accordingly in the web demo too.
First, I have a store of custom functions, and allow for registering new functions and retrieving functions for a given model class. This is kind of similar to how we have routes registration in the Express.js app.
// client/store.js

const customFunctions = ref({});

function registerFunction(modelClass, fnType, fnName, fn) {
  customFunctions[modelClass][fnType][fnName] = fn;
}

function customFunctionsForModel(modelClass, fnType) {
  return customFunctions[modelClass][fnType];
}
Then, the web data access will act like the route handler, where it will receive the data access request, and try to lookup the corresponding function and invoke accordingly.
// client/web.js

function lookupFunction(modelClass, fnType, suffix) {
  const functions = dataStore.customFunctionsForModel(modelClass, fnType) || {};
  if (suffix) {
    return functions[suffix.path] || dataStore[fnType];
  } else {
    return functions[fnType] || dataStore[fnType];
  }
}

return {
  registerFunction: dataStore.registerFunction,
  lookupFunction,
}
For example, I have a custom logic in the Invoices module that allows the user to preview an invoice. This is done by aggregating data from various models, so it’s not a simple Read API.
// client/plugins/invoics/store.js

import { useWebAccess } from 'client/web';
const dataAccess = useWebAccess();

function previewInvoice() {
  // implement accordingly
}

dataAccess.registerFunction('invoices', 'view', 'preview_invoice', previewInvoice);
Now, in my ViewInvoice component, I can call the data access layer to preview invoice, and underlying it will lookup the correct custom function if this is a web demo.
// client/plugins/invoices/ViewInvoice.vue

<script setup>
import { useDataAccess } from 'client/dataAccess';

const dataAccess = useDataAccess();

onMounted(async () => {
  await dataAccess.view('invoices', props.id, {}, { path: 'preview_invoice' });
    .then((result) => {
      currentInvoice.value = result;
    })
    .catch((error) => {
      console.error(error);
    });
});
</script>
In this case, if I’m building for the web demo, it will go through the web data access layer to lookup the custom function
and invoke the logic. If this is the Electron app, then it will go through the API data access layer and send a request
to the server at /api/invoices/:id/preview_invoice.

Exact same functionalities as the desktop, except using browser’s local storage.
PDF Generation
One of the main features of this app is the ability to generate invoices or receipts from user-defined templates. Since this app has a client-side only version and a Node.js-backed desktop version, I implemented 2 different ways of generating PDFs depending on the mode.
Server-side Generation
Let’s start with server-side generation. After some search online, I found that there’s a library called node-html2pdf
which allows for server-side HTML to PDF generation. How it works is by launching a headless browser using puppeteer,
render the markup accordingly, then print the page as PDF.
At first, I’ve managed to install it and use it as-is and it works fine in development mode. But when I built it into
the Electron app, the PDF generation stopped working. After some debugging, I realised that it is probably because the
transitive dependency puppeteer is not built into the Electron app, so it can’t be used to run the headless browser
to generate the PDF. In the end, I’ve decided to instead install puppeteer as a direct dependency, and borrow some
of the original library’s code and customise to suit my use case.
// server/shared/routes.js

async function downloadPdf(templateType, id) {
  return function(req, res) {
    const params = req.body;
    const id = req.params.id;
    const result = stores.view(id, {});
    const template = result.record;

    const filename = `${templateType}_${id}.pdf`;
    const htmlString = await html2pdf.createHtmlString(template, params)
      .then((result) => {
        logger.log(`Parsing complete!`);
        return result;
      })
      .catch((error) => {
        logger.error(`Error parsing template!`, error);
        return ``;
      });

    await createResponse(res, htmlString, filename);
  }
}
Then, whenever my API requires PDF generation, I will register the route to use the downloadPdf handler.
// server/modules/invoice_templates/routes.js

const routes = [
  { method: 'post', path: '/:id/pdf', handler: routes.downloadPdf('invoice_templates', id) },
];
Client-side Generation
On the other hand, HTML to PDF conversion is easier for the client, because there’s no need to use a headless browser
to render the markup first before printing the page as a PDF. In this case, I simply just use the html2pdf.js library
to do the job. It works slightly differently from the node-html2pdf library. Instead of printing the page to PDF,
the client-side library generates a screenshot of the page and save it to PDF format.
// client/pdf.js

async function downloadPdf(modelClass, id, params) {
  const template = dataStore.view(modelClass, id, {}).record;
  const htmlString = await createHtmlString(template, params);

  return new Promise((resolve, reject) => {
    html2pdf().from(htmlString).outputPdf('arraybuffer')
      .then((result) => {
        resolve({
          data: result,
        });
      })
      .catch((error) => {
        reject(error);
      });
  });
}

export default {
  downloadPdf,
};
Then, I implement the web data access version accordingly.
// client/plugins/invoice_templates/store.js

import pdf from 'client/pdf';

function downloadPdf(templateType, id, params) {
  return pdf.downloadPdf(templateType, id, params);
}

dataAccess.registerFunction('invoice_templates', 'view', 'pdf', downloadPdf);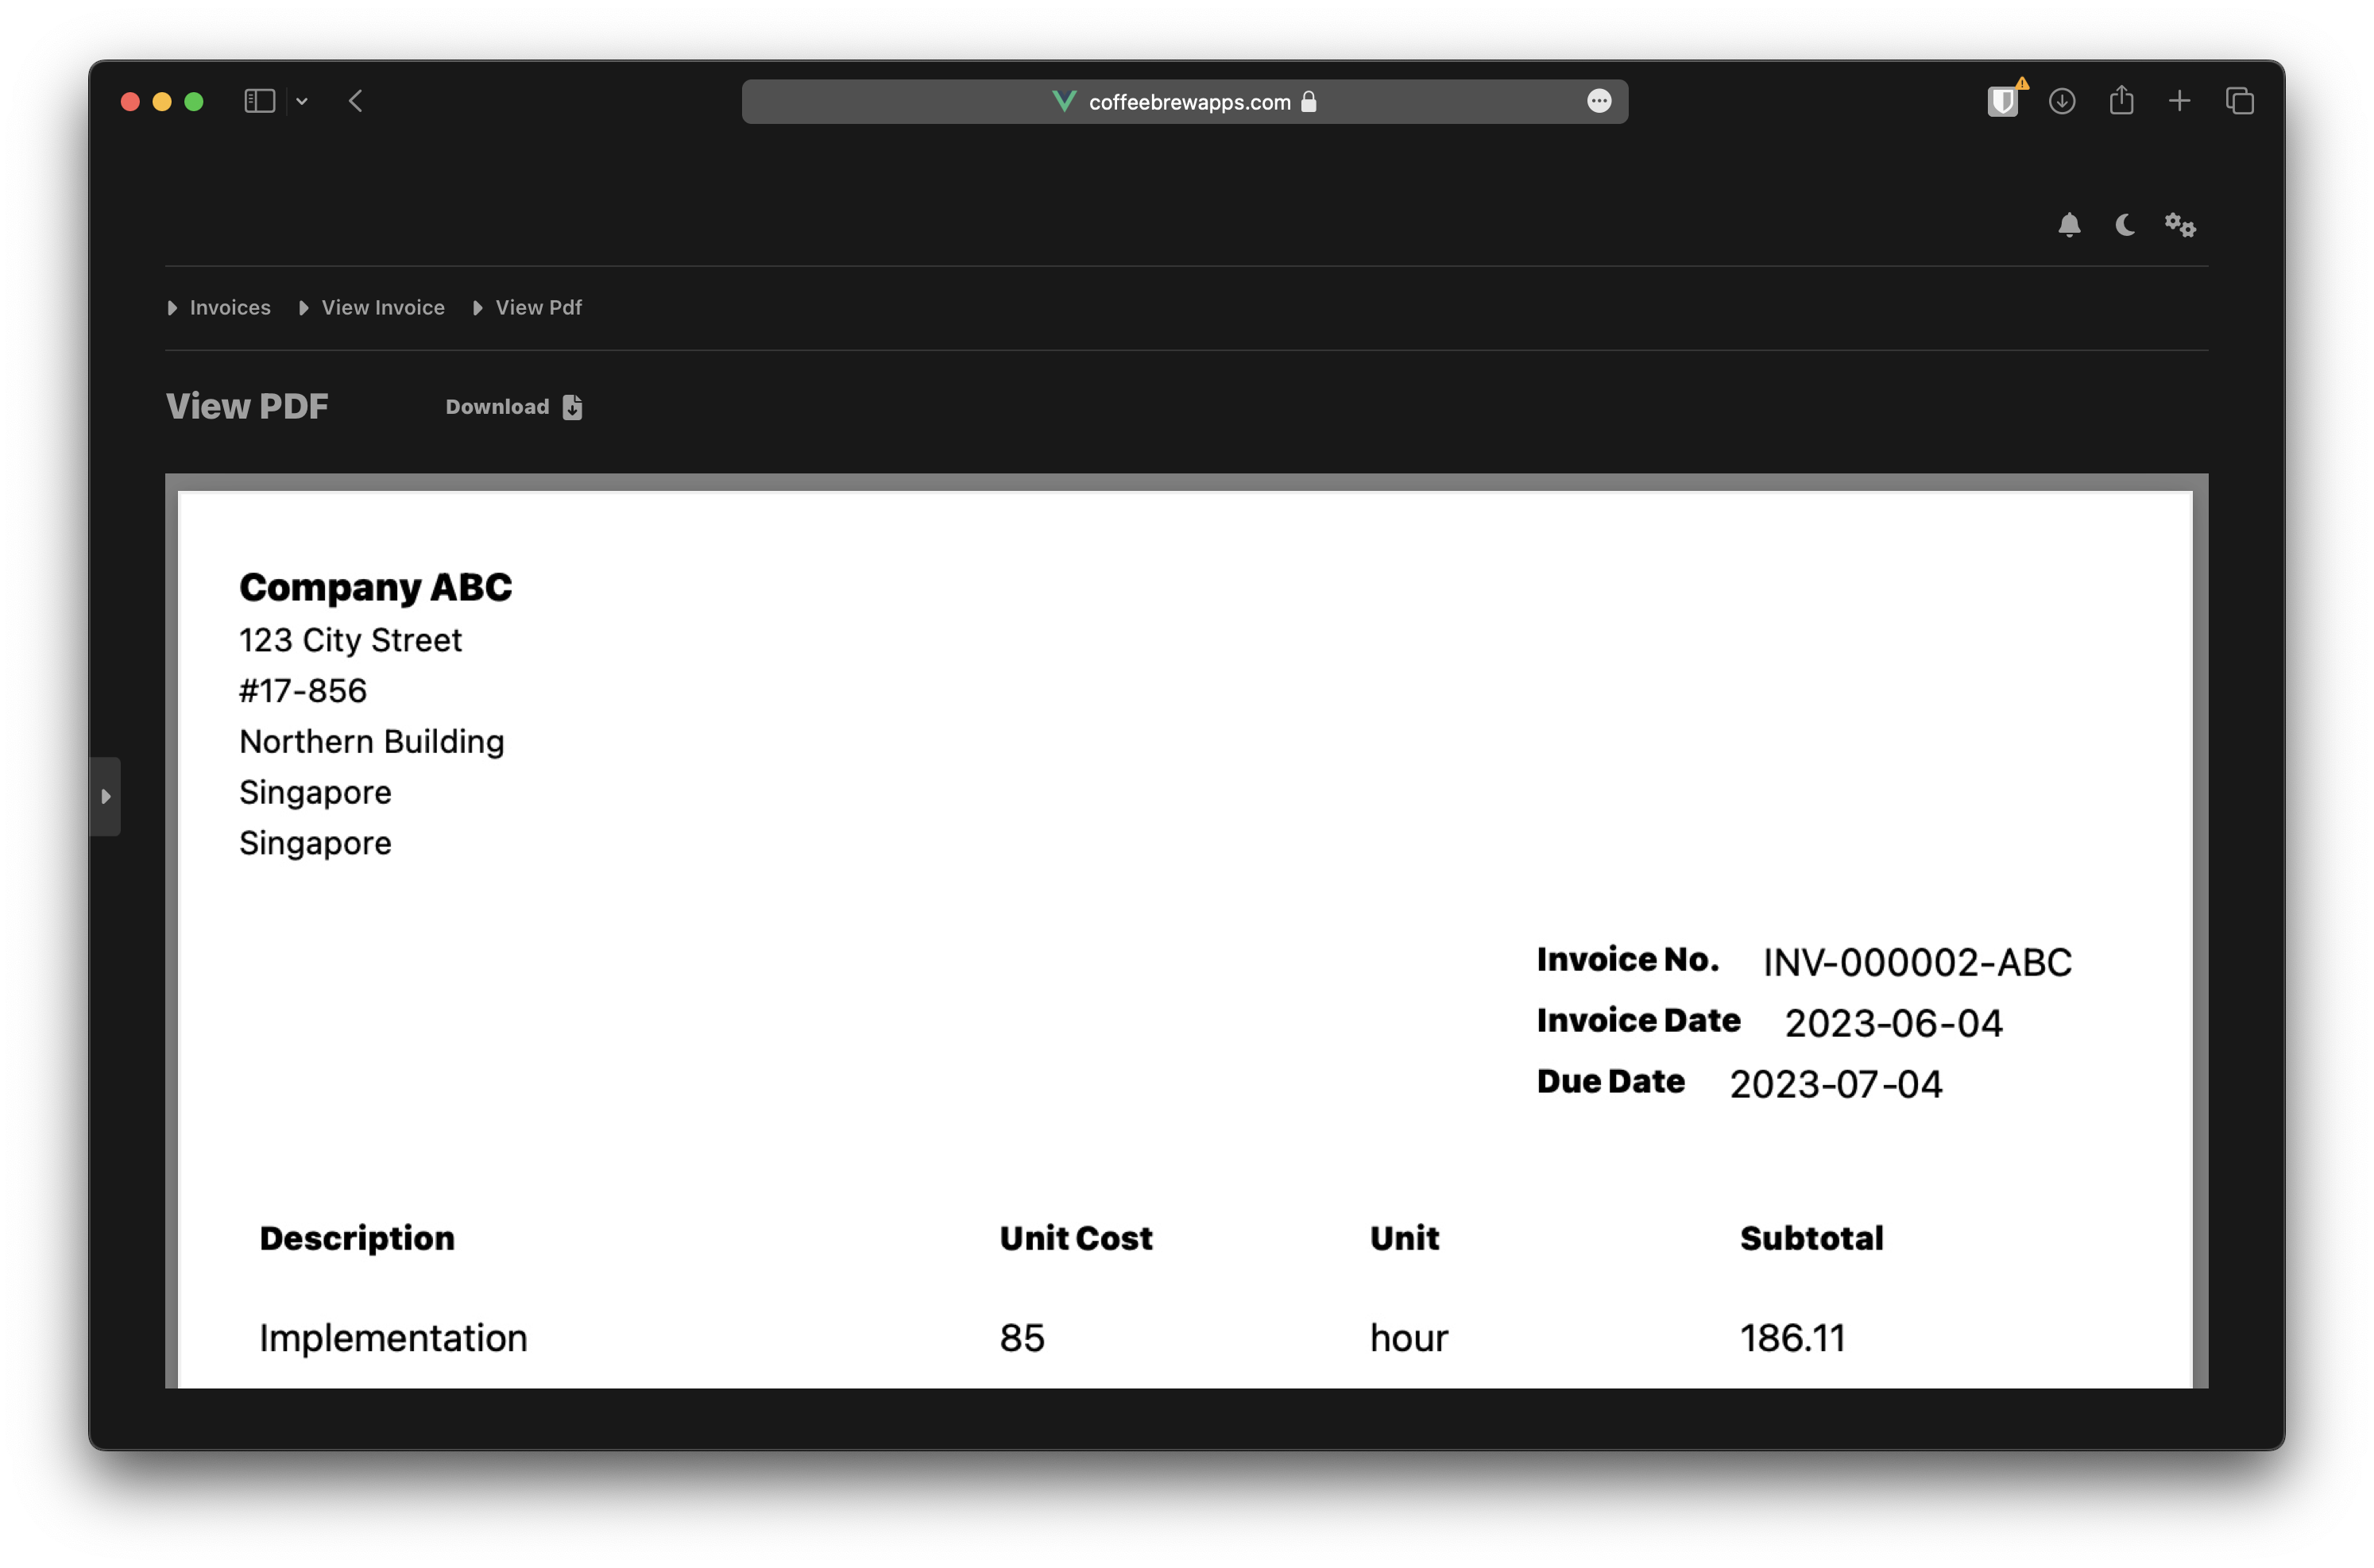
User can define custom templates and generate invoices in PDF.
That’s All For Now
This has been quite a long and technical read, I hope that it is useful information for you! The app is probably about 80% done now, the remaining work involves implementing a recurring task runner, charts, and a lot of UI/UX polishing.
For now, you can already have a glimpse of the web demo (link in References). Play around with it and let me know what you think! UI/UX feedback is very much welcome as I’m in the stage of polishing the app.
That’s all for now, stay tuned for more updates!